Creating a DIY wooden ottoman frame not only serves a practical purpose but also adds a personal touch to your home décor. This project is an excellent way to enhance your woodworking skills while crafting a functional piece that complements your living space. Engaging in such hands-on projects can also bring a sense of accomplishment and creativity into your home environment.
Materials Needed
To start your DIY wooden ottoman frame, gather the essential materials: wooden boards (preferably pine or plywood), wood screws, wood glue, sandpaper, and a wood finish or paint. You’ll also need tools like a saw, drill, measuring tape, and a screwdriver. Choosing high-quality materials ensures durability, so invest in the best you can find within your budget.
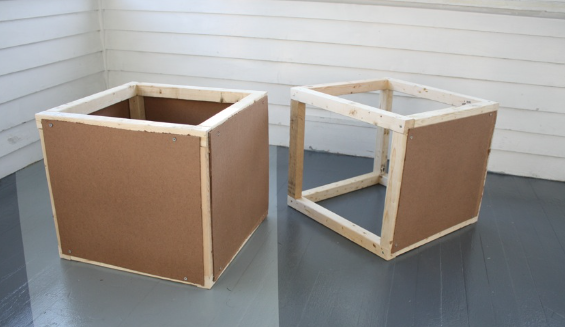
Building the Frame
Begin by measuring and cutting your wood to the desired dimensions for the ottoman. A typical size is around 18 inches high and 36 inches long, but adjust according to your preference. Assemble the frame by attaching the sides, front, and back using wood screws and glue for added strength. Don’t forget to sand the edges well to prevent any splinters and ensure a smooth finish.
Adding the Top and Finishing Touches
Once your frame is complete, it’s time to add the top. Cut a piece of plywood to fit snugly on top of the frame and secure it with screws. You can enhance comfort by padding the top with foam and covering it with fabric, depending on your style. Finally, apply a stain or finish to protect the wood and match it with your existing furniture.
With your newly crafted ottoman, not only will you have a stylish addition to your home, but you’ll also enjoy the pride of having made it yourself. Don’t hesitate to explore different designs or modifications to fit your personal taste. Happy crafting, and may your DIY journey continue to inspire you!