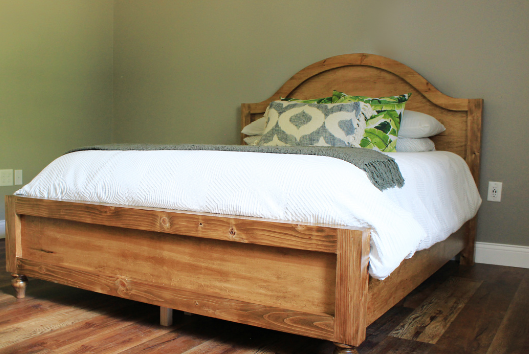
Creating a wooden bed headboard can greatly enhance the aesthetic of a bedroom while also providing a functional element to your sleeping space. Not only does it serve as a backdrop for your bed, but a well-crafted headboard can also reflect your personal style and add warmth to your decor. This guide will provide you with easy steps to make your own stunning wooden headboard.
Choosing the Right Wood
The first step in making a wooden headboard is selecting the right type of wood. Popular choices include pine for its affordability and ease of use, oak for durability, or reclaimed wood for a rustic charm. When selecting your wood, consider factors such as color, grain pattern, and texture to complement your bedroom’s existing decor. If you’re going for a specific style, the wood you choose will set the tone for the entire project.
Measuring and Cutting Your Wood
Once you’ve chosen your wood, accurate measurements are crucial for a successful build. Measure the width of your bed and determine the height you want for your headboard, typically ranging from 36 to 48 inches. After marking your measurements, use a saw to cut your wood to the correct size. Ensure to sand the edges smoothly to prevent any splinters and to give your headboard a polished look.
Assembling the Headboard
After cutting your pieces, it’s time to assemble your headboard. If you are using multiple boards, align them side by side and secure them using wood glue and screws, or consider using brackets for a more robust hold. Depending on your design, you might also want to add additional decorative elements like molding or a cushion backing. Once assembled, finish your headboard by applying a stain or paint to protect the wood and achieve your desired aesthetic.
With just a few materials and a bit of creativity, you can craft a beautiful wooden headboard that elevates your bedroom’s style and comfort. Dive into this rewarding project and turn your vision into a reality!