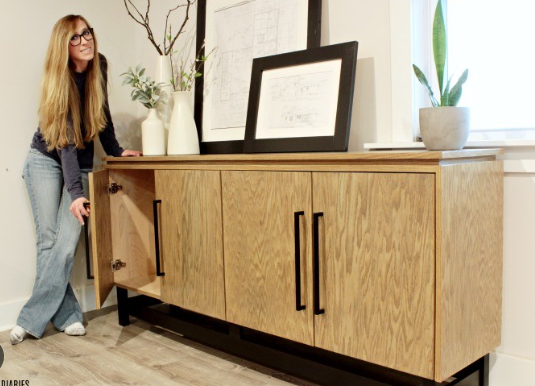
Creating a DIY wooden sideboard can greatly enhance your home’s storage options while adding a personal touch to your interior design. Not only does it provide practical space for items, but it also serves as a stylish focal point. This guide will help you understand the benefits and steps of building your own sideboard, making it an attractive and functional addition to your living space.
Benefits of a DIY Wooden Sideboard
One of the most significant advantages of a DIY wooden sideboard is customization. You can tailor the dimensions, design, and finishes to fit your space and style, ensuring that it complements your home’s aesthetic. Additionally, crafting your own furniture can be more cost-effective than purchasing pre-made pieces, allowing you to select high-quality materials without breaking the bank.
Building a sideboard also offers an engaging project that can enhance your woodworking skills and boost your confidence in DIY furniture making. It’s satisfying to create something with your own hands that meets your functional needs while adding character to your home.
Essential Materials and Tools
To start, you’ll need high-quality wood suitable for your design, such as pine, oak, or plywood, depending on your desired aesthetic and durability. Essential tools include a saw, drill, screwdrivers, sandpaper, and wood glue. A measuring tape and level will also be crucial to ensure all parts fit together perfectly and maintain stability.
Consider additional items like wood stain or paint to finish your sideboard according to your interior decor. Investing in protective finishes will help extend the lifespan of your piece, keeping it looking new and polished for years to come.
Step-by-Step Construction Process
Begin by sketching your design and gathering precise measurements of your planned space. Cut all wood pieces according to your design, ensuring you have the necessary components for the top, sides, shelves, and back. Assemble the frame using wood glue and screws for stability, and ensure everything is square as you go.
Once assembled, sand down all surfaces to avoid splinters and prepare for finishing. Apply your chosen paint or stain, allowing it to dry completely before adding any hardware like knobs or handles. Finally, secure the sideboard to the wall if necessary, particularly if it’s tall or heavy, to prevent tipping.
Creating a DIY wooden sideboard is not just a practical project; it’s also an opportunity to express your style and creativity. Whether you’re an experienced woodworker or a beginner, taking on this task can be immensely rewarding. Dive into the world of DIY and transform your space today!